Replacement windows are the gift that keeps on giving. There are so many benefits of replacement windows, including giving your home a facelift, increasing the value of your home, and saving you money on utility bills. If your windows are outdated, drafty, or rotting, it may be time to consider replacement windows. At E&E Contracting, we are experienced with a wide variety of windows; let’s take a look at some of our favorite types of windows to install for our customers.
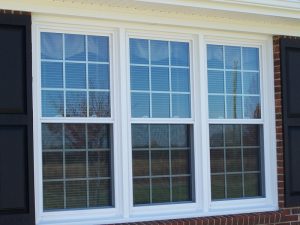
This style of window is the most common, and what most people picture when they think of residential windows. Single hung windows are typically rectangular or square in shape, and have two window sashes. They open vertically from the bottom, and the top sash remains stationary.
Double hung windows have the same appearance, but with a few added benefits. Both the top and bottom sash can be opened, and they typically have the ability to tilt in and out for easy cleaning. This is the most popular replacement window style and we love installing them in our customers’ homes.
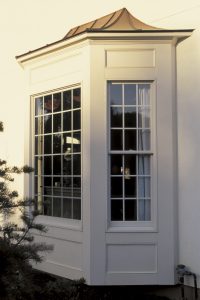
Bay windows are a stylish choice that bring in tons of natural light and add a point of interest to your home’s exterior. Bay windows protrude from your home and leave a large window sill or window seat on the inside. They usually consist of one large showcase window in the center and a smaller window on each side.
At E&E we have replaced our customers’ existing bay windows, but we can also add bay windows to almost any home. To install a bay window the home needs to have at least 6.5 feet of free space, and interior space to accommodate the window seat or sill. Contact us today to discuss adding a bay window to your home!
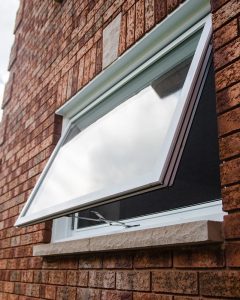
Awning windows are a great option for people looking for the natural light and ventilation of a window, but with some additional privacy. They have the ability to be placed higher on the wall which maximizes wall space, and offers more privacy on the inside. Awning windows open outward using a top hinge. When opened the glass serves as a top shield, which means they can be open even when it is raining.
Awning windows work great in areas that require privacy and may have limited wall space. We love adding them to our customers’ kitchens and bathrooms to provide extra light and privacy.

Casement windows operate in a similar way to awning windows, but they open outward via a hinge on the side. They are also called crank windows, because they are operated with a handle that cranks the window open. We love using casement windows in areas where it may be difficult to open a single or double hung window. Areas like over a sink, or tight bathrooms are great locations for casement windows.
Casement windows can also be used to complement a bay window. Placing casement windows on the far sides of a bay window can allow you to get as much ventilation as possible, and prevent you from having to reach over the larger window sill to open them.

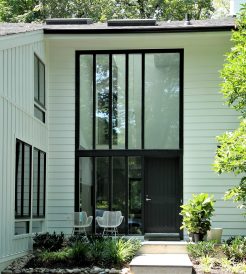
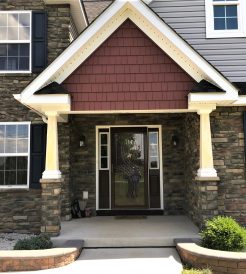
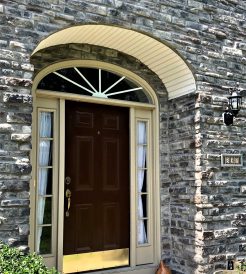
Transom windows are a little different than the window styles we have already discussed; they are accent windows typically found around doors or entryways. They are rectangular or circular in shape and offer a beautiful accent to exterior and interior doors, while also bringing natural light into the home. They can appear on the door itself, and can also be used on the door frame to wrap the door.
At E&E we love using transom windows to enhance the new doors we install for our customers. Contact us today to discuss our replacement door options!
Are you interested in upgrading your home with replacement windows? Contact us today for a complimentary quote!
Home additions are big projects that cost tens of thousands of dollars, depending on the scope. No matter the size, you need to finance the project. Here are some popular ways to finance your home addition.
Before you figure out how you will finance your home addition, you need a general understanding of how much your project will cost. Many popular additions have an approximate price range to help you understand how to finance them. For example, a small project, like enclosing a porch, will cost only a few thousand dollars. A big project, like an in-law suite, could cost around $90,000 to $120,000. Check out our guide to see how much your project may cost.
If you plan ahead with something like a 5- or 10-year plan for your home, you can start setting aside some cash every month towards a home addition. This method will be the cheapest in the long run, as you won’t have to worry about interest. The downside to saving cash is that it takes time. Depending on the scale of your project and how much you can afford to set aside every month, you could have to wait decades before your project can even begin.
Check with your contractor to see if they have a financing partnership with a financial institution. These special financing options have competitive rates when compared to independent financiers because of the partnership with the contractor. Often, you’ll receive a revolving line of credit that you could use for multiple projects or to cover hidden costs that arise during construction.
If you’ve lived in your home for several years, you likely own a significant amount of equity in your home. You are able to leverage this equity to secure a Home Equity Loan (HEL) or Home Equity Line of Credit (HELOC). Both options are essentially second mortgages, but are used in different ways. The benefit is that these have lower interest rates than a personal loan or credit card. The downside is that you need to own enough equity in your home to receive the funds.
HEL is a lump sum of money you’ll receive immediately to pay for your addition. Since you receive the money immediately, you’ll start making payments on the loan immediately, too. These payments will be on the principal and interest.
HELOC is a revolving line of credit, similar to a credit card, that you can draw money out of up to a maximum amount. They are more flexible than a HEL because you’ll only draw out what you need when you need it. You’ll have a draw period for when you can use this line of credit. During this time you only need to pay interest, and principal payments are optional. At the conclusion of your draw period, you’ll be required to make payments on interest and principal.
A different option to leverage your home equity is by refinancing your home. You’ll be “cashing out” by replacing your current mortgage with a new one at a higher amount than what you currently owe. The difference between your new mortgage amount and the amount owed on the old mortgage will be cash in your hand to use on your addition. A cash-out refinance is more convenient than HEL or HELOC because you’ll only be making one payment a month, but you should only consider this option if you can secure a new mortgage at an equal or lower interest rate than your current mortgage.
If you don’t have enough equity in your home to justify one of the options above, you can still apply for a personal loan or a personal line of credit. The financial institution will take into consideration your income and credit history to determine how much to loan to you. Just like with a HEL and HELOC, a loan is a lump sum while a line of credit functions similar to a credit card. Be wary, however, when using a personal loan or line of credit. These often have the worst interest rates and you’ll likely be better off using the promotional rates of your contractor’s partnership with a financier.
If you’ve already talked to us about your home addition project and need financing before we get started, check out our financing page. We partner with Wells Fargo Home Projects for special financing options for E&E Contracting customers only! If you’re not that far along in the process and still need to talk to a representative, contact E&E Contracting online today!
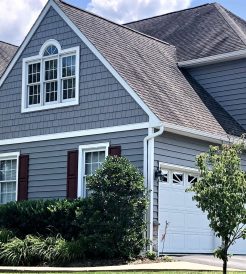
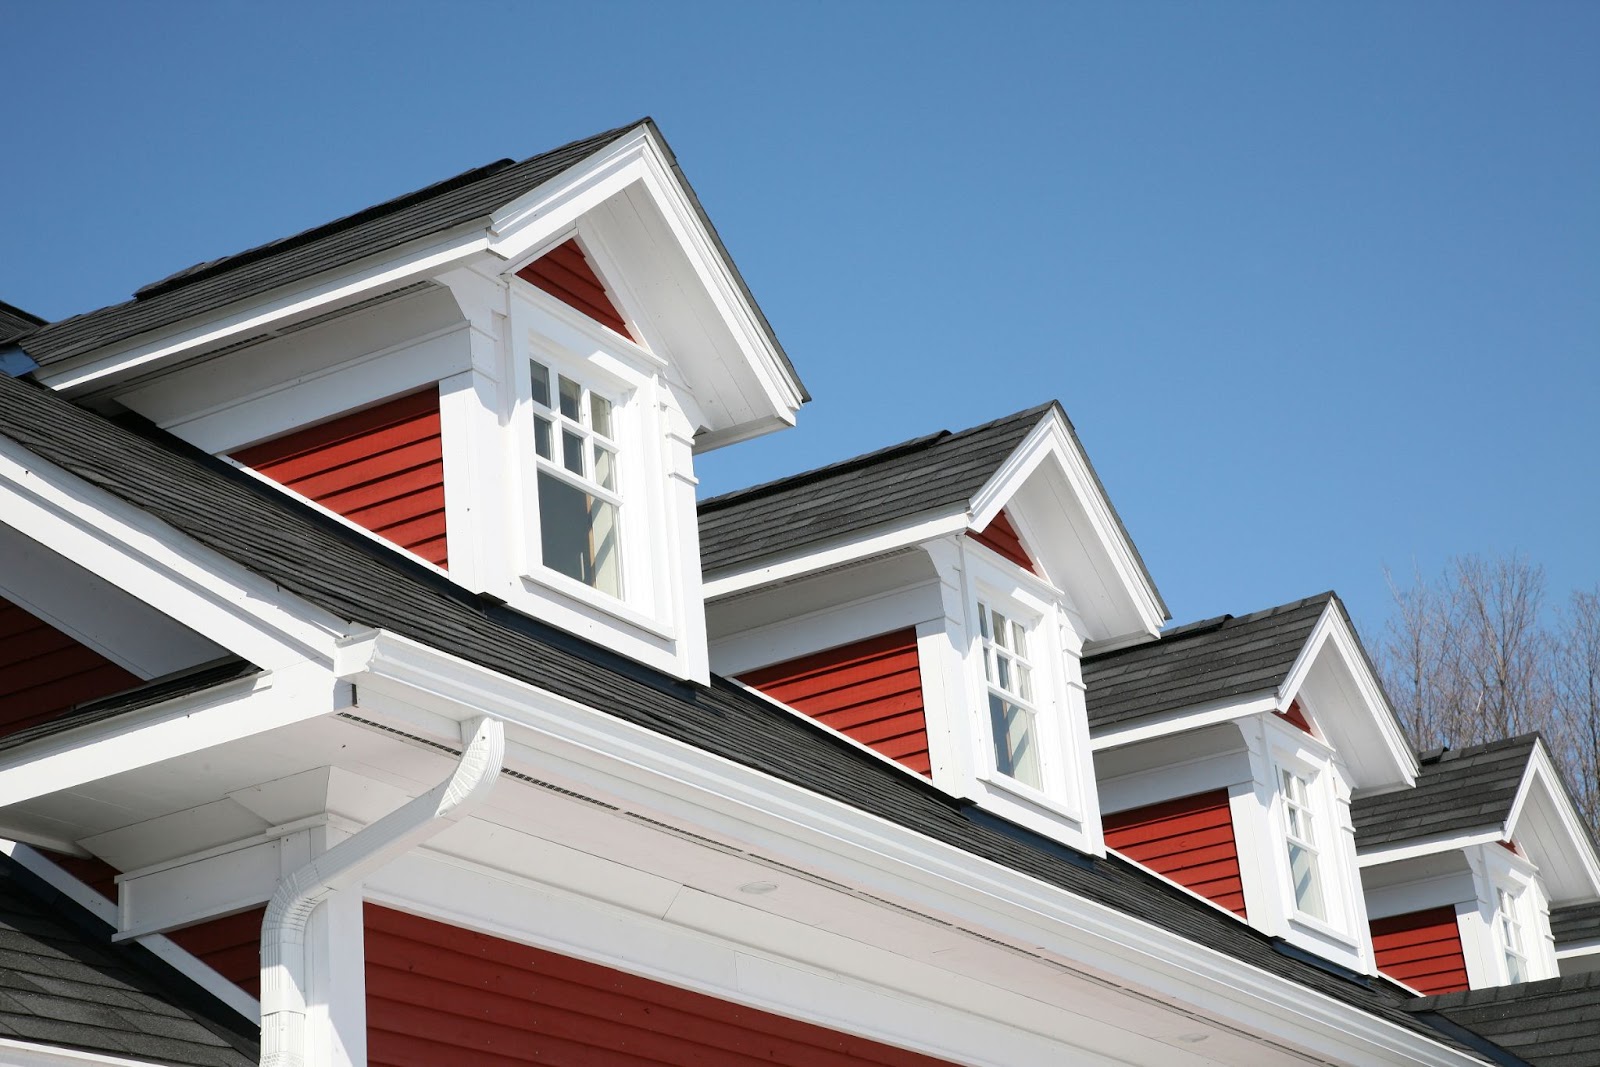
Asphalt shingles have been one of the most popular roofing materials in the US for decades, and we love using them to give our customers’ homes a durable and stylish refresh. Despite asphalt shingles being a popular roof choice, we find that many of our customers aren’t familiar with the material and come to us with a lot of questions. Today we are going to do a deep dive on asphalt shingles so you can decide if they are the right material for your upcoming roofing project.
Asphalt shingles were originally developed in the early 1900s as an alternative to cedar shingles. At this time asphalt shingles were similar to asphalt roll roofing, where a felt or cloth roll was coated in asphalt. Soon, manufacturers began to add slate granules for texture and durability. As the years went by and roofing technology continued to advance, there are now lots of asphalt shingle options to suit your needs. Below we have outlined the most popular styles of asphalt shingles available today.
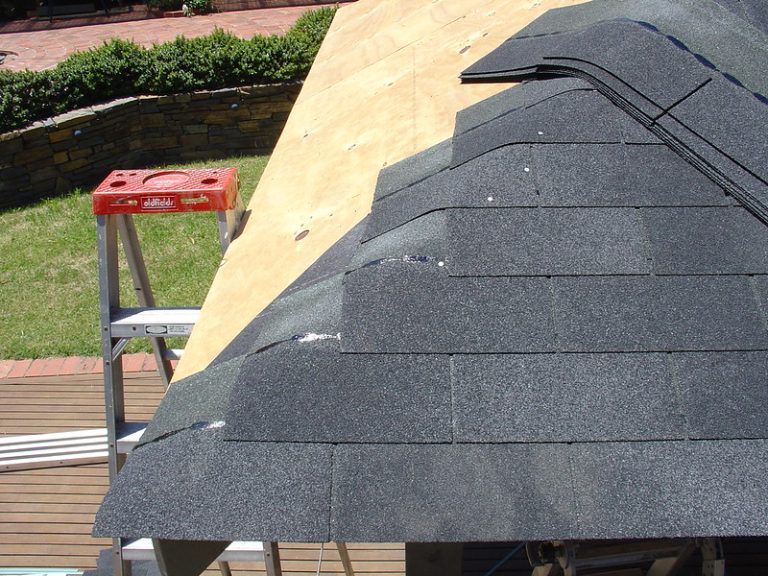
Three tab shingles are made from a fiberglass material and coated with asphalt. These materials are put onto a roll, and cut into 3 equal tabs that offer a clean and uniform finish. These are the most affordable asphalt shingle option, but they can be less durable than some of our other favorite options.
Architectural shingles were developed after three-tab shingles, and expanded on the design to increase durability and style. Architectural shingles are made with multiple layers of asphalt coated fiberglass that are laminated together, and cut together differently for a more stylistic finish. They are an incredibly durable option, and often come with some great warranty options.
Designer shingles don’t differ from architectural shingles in their construction, but offer unique color and style options to make your home pop. Many designer shingles will resemble cedar or slate shingles, which is a great option for homeowners who love the style of these older roofing materials, but want the durability of asphalt shingles.
There are lots of shingle brands out there, and at E&E Contracting we choose to work with GAF Shingles. GAF has been innovating the asphalt shingle industry for over 100 years, and in our experience their asphalt shingles provide homeowners with the best durability and style in the industry. GAF’s innovation doesn’t just stop at the shingle; they also manufacture top class leak barriers, roof deck protection, and ventilation and attic vents. We love using all of these products to create a roof that is built to brave whatever nature has in store for your home.
This is the most common question we get about asphalt shingles, but there is no set expiration date for asphalt shingles. Home location, climate, exposure to weather and sun, and other factors can cause variations in the durability of the material. That being said, most asphalt shingle brands come with a warranty that guarantees their product for a certain number of years.
GAF’s warranty is one of the best in the industry, offering a limited lifetime warranty on their shingles. They also have a variety of other warranties associated with their shingles, including algae, a 130 mph wind warranty, and warranties that cover their leak barriers and other products.
If you are unsure if your roof needs new shingles, we recommend a roofing inspection, and you can also check out some signs that you may need a new roof.
We’ve talked a lot about the durability of asphalt shingles, but how much do they cost? Surprisingly, asphalt shingles are one of the most affordable roofing material options out there. According to Home Guide, homeowners can expect to pay between $80-$250 per square foot on their next roofing project.
This price can be affected by the shingle brand and style you choose, the contractor, and the size/intricacy of your roof.
Are you ready to take on an asphalt shingle roofing project? The team at E&E Contracting would love to speak with you, contact us today for a complimentary quote!
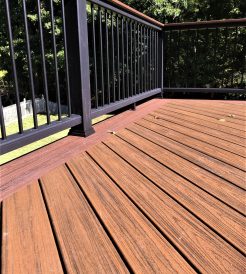
High-quality decks can last for decades if they are properly taken care of with yearly maintenance. Thorough maintenance should be completed at least once a year, ideally in the springtime before heavy use during the summer months. You’ll want the deck in good condition for your summer get-togethers! Here’s a list of tasks to complete during your yearly deck maintenance.

The first thing you’ll need to do with deck maintenance is clean it. Temporarily move all of your deck furniture to your garage or yard for temporary storage and start by sweeping all debris, like fallen leaves, off of your deck. Next you’ll want to wash your deck to clean and prevent mildew and other stains. Using a pressure washer will make this task easy but be careful with how strong you pressurize your machine. Pressure washing at high pressures will damage your deck more than help it. Keeping it around 500-600 psi is safe. If you don’t own a pressure washer, hand mopping and scrubbing is a good alternative.
Once the deck is clean, you’re better able to inspect the wood for any rot or other damage. Don’t just look at the decking surface; go underneath the deck to inspect the joists, beams, and posts. It’s also very important to inspect the ledger board for any water damage to your house foundation. Any rotten wood you find will need to be replaced. If you don’t encounter any rotten wood, you’ll want to stay underneath the deck and move on to the next step.
After inspecting all of your wooden deck components, it’s time to inspect the hardware. All of your fasteners, screws, and nails should be tight and secure to their anchor points. Tighten any loose hardware you encounter and replace it if it’s unable to be tightened or is rusting. Once you’re done underneath the deck, head back to the top to finish your inspection. If screws or nails are protruding from the floor, hammer or tighten them until they’re flush with the surface. Sometimes, you may need a new nail or screw. Finally, push against all hand railings to ensure they are tightly fastened to the deck

Finally, with any new wood installed and everything tightened, it’s time to sand and reseal your deck. Do not do this step the same day that you wash the deck or after rainfall. You should allow 48 hours for the wood to fully dry. Sanding your deck with 80-grit sandpaper keeps it smooth and free from splinters or fuzzy patches. You can use an electric sander but it’s not necessary. Be sure to sweep or vacuum all sawdust before sealing.
Deck sealant protects your wood from cracking, cupping, and warping. Wood finishes made for other purposes, like varnish or lacquer, are no good here. Use protective sealant designed for decks. Similarly, paint is not recommended; it has a tendency to peel and crack. You can use a stain and sealant mix to recolor your deck instead.
Composite decks are more durable and require less maintenance compared to wooden decks. This doesn’t mean you can skip out entirely on yearly maintenance. You’ll still need to sweep and wash your deck, the only difference being you’ll use a composite deck cleaning agent. You’ll still need to inspect any wooden elements for rot and check all of your fastenings. The real time saver with composite decks is that there’s no need for sanding and resealing.

Although the majority of deck maintenance occurs during the spring, you still need to upkeep your deck throughout the year to minimize your work and expenses in the spring. Regularly sweep your deck clean of debris, especially when leaves fall in autumn.
In the winter, it’s very important to keep your deck safe from snow and ice. Water can seep into your wood, freeze, and expand, causing cracks in your decking. You can lay a tarp across your deck to protect it from the snow. If you don’t have one, be sure to shovel immediately after a snowstorm. You can also use ice melt to prevent the buildup of ice on your deck; however, do not use a salt-based ice melt. Rock salt can scratch and damage your wooden decks. There are plenty of non-salt ice melt alternatives on the market for you to choose from.
Have you neglected your deck and it’s in disrepair? Or perhaps you’re just exploring the possibilities of deck ownership. Consider purchasing a new deck from E&E Contracting. Our expert staff are happy to answer any questions you may have about constructing a deck in your backyard. Contact us today for a free consultation.
An attic conversion is an excellent addition to your home, which easily gives you more living space without impacting your lawn space. Often, these remodels will be less expensive than a brand new addition, as there’s usually no need for framing and foundation work. You can even increase the square footage of liveable space in your home, increasing its value. Here are the steps you’ll take to build an attic conversion. If you partner with a remodeling contractor, they’ll help you every step of the way.
Before any construction begins, you’ll need to research the permitting requirements of your municipal zoning board. They may require a building permit depending on the scope of your conversion. If you are simply installing flooring and drywall, you might not need any permits. If you are installing utilities or making any structural changes, like adding dormers, then you will need permits. Check with your local government for your specific requirements.

First, floors must be secure enough to hold the weight of people & furniture on them. Many attics may not be originally built to support this weight, so additional joists and supports may be added. Depending on your local ordinances, you may also need to install a stairway if your attic is only accessible by ladder. Next, you may want to replace old, inefficient insulation with newer insulation. High-quality insulation, like spray-foam insulation, makes the space feel like a real room in your home, planned from the start.
Any utilities, like eclectic or HVAC, should be installed before finishing. From there, drywall and flooring can be installed. The drywall and a fresh coat of paint will make the room look finished. Your flooring choice can be whatever you want and can impact the functionality of the space. Carpeting is a nice soft flooring for a kid’s playroom. Hardwood is a nice, classic look for a study or office space.
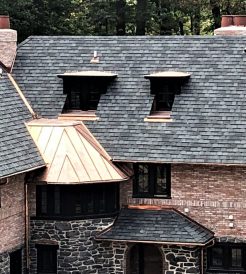
When you want extra lighting or floor space in your attic, a good option is to build out a dormer. A dormer is a roofed structure that projects out from the pitch of the roof to allow more space and light in your attic. It has a vertical window and three walls, allowing you to fit taller items or more standing room in a slanted attic.
Dormers are built after the floor is reinforced but before any insulation and finish work is done. First, the layout will be marked on the floor and roof before the roof is opened. Roofs are opened by marking the shingles and sawing along them. Then, the rafters are reinforced and the walls’ frame is built. After the frame is built, the roof is extended over the dormer and the dormer’s rafters are installed. Lastly, the exterior and interior walls are finished.
Finished attics only count as square footage in your home when they satisfy certain requirements. Typically, you must have a ceiling height of at least 7 feet over at least 70 square feet of floor space. So, your attic may be hundreds of square feet but the slanted ceilings prevent you from counting the entire space. If you don’t meet the 70 sq ft minimum requirement, or would like to include more square footage in the total, then 7 ft dormers will give you that extra amount of space that counts towards the total. This area must also be properly climate controlled and have windows for natural lighting and emergency escape routes. Check with your local ordinances to understand what you can and cannot count as liveable space.
If you’re not as skilled with tools or don’t have the time to renovate your attic on your own, then trust an experienced contractor to do the job right. E&E Contractors uses exceptional materials and quality workmanship to deliver the best results possible for your renovation. Contact us today to start planning your attic conversion.